


When a user (originator) sets up a Quick Sign (QS) process and sends it to signers, the QS process has started. You can track and/or cancel it from your dashboard’s Quick Sign module or in the Documents page under Quick Sign.
Signers will receive an invitation email informing them they have a document to review and sign. (Note: Admins and members can customize the invitation email when configuring the Quick Sign in Docubee). The email includes a Review Document button that will navigate them to the document. They can then sign the document and click Submit Document.
Note: Users don’t need a Docubee account to fill and sign their document. So, any user can access their link, fill in, and sign documents.
If you have a Docubee account and are one of the signers:
- Log in to Docubee and select the workspace.
- From the list of QS processes, select the one to sign.
- On the right, under Recipients, click the Sign Document link available to you.
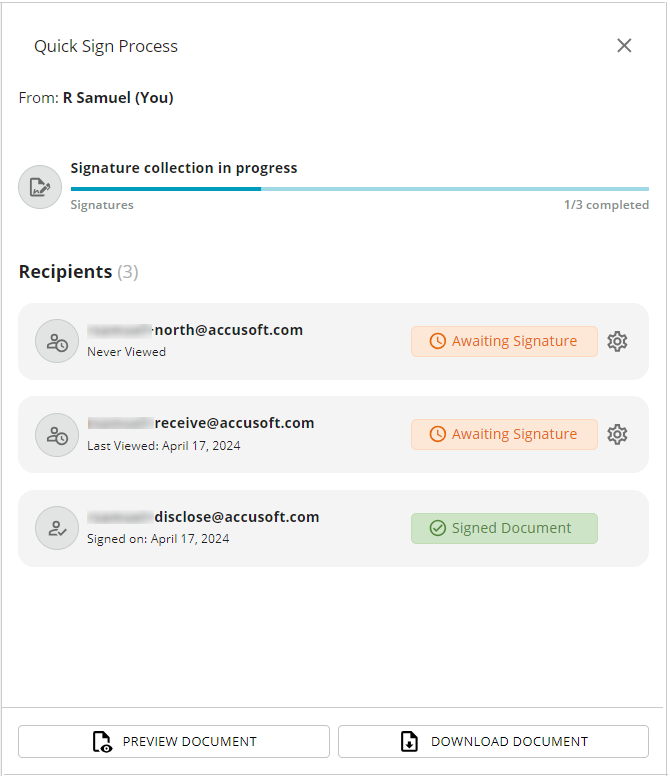
- The document to sign is displayed.
- Click the Next Field button at the upper-right corner of the viewer to navigate to the next empty assigned field.
- Sign the document and click Submit Document.
- If your QS process was configured for signature and payment collection, the button will be Submit and Pay.
- The Collect Payment modal displays the payment provider’s interface.
- Select from the payment options the provider offers and enter information in the rest of the fields.
- Click Submit Payment.
- If your QS process was configured for signature and payment collection, the button will be Submit and Pay.
- The message, “Your document has been signed successfully”, will be displayed.
After the signatures are completed, the finalized document is sent via email to the originator and specified recipients and signers. They can click the download button included in the email to download and save the signed document and its audit trail.
Note: The Download button option will be toggled off by default. The person sending the document will need to toggle it on.
Note: The Download button is only valid for two weeks.
If it was a sign and collect payment QS process:
- And you choose to let them also receive attachments by turning on the toggle switch, Receives all attachments, in the Fill or Sign modal, then the email will be sent only after the signature and payment has been submitted.
- The audit trail will also include information about the payment made.
Related Information
Quick Sign
Create Signature and Initials
Docubee 101 September Webinar Recording
Additional Resources
Need more help getting set up? Contact us for assistance from our customer support team or register for Office Hours.

")
