Salesforce Setup Instructions
- From Setup, enter Apps in the Quick Find box and select App Manager.

- Click New Connected App.

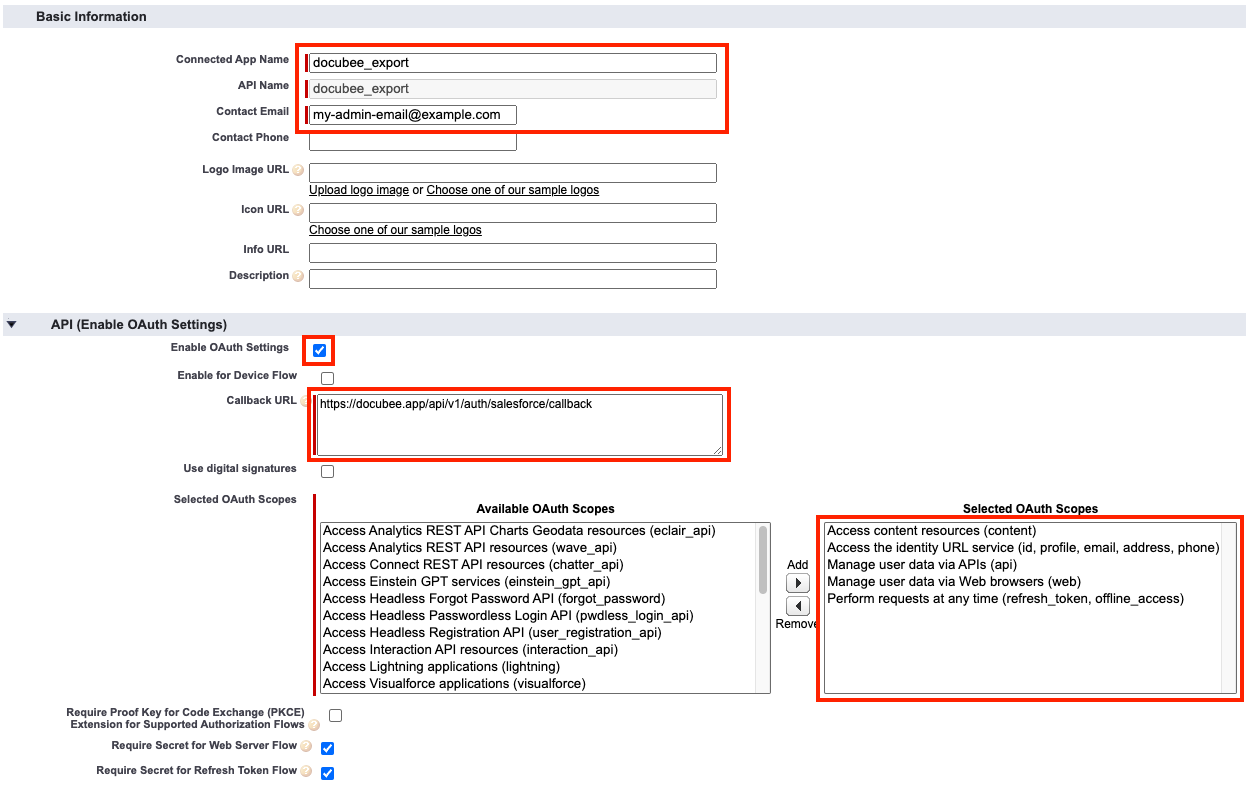
- Once in the configuration menu, fill out the information based on the image below.

- After the information is entered click the Save button and you will be brought to your new Apps information screen.

- Click on Manage Consumer Details to view the consumer key and consumer secret.

- Copy these values and save them somewhere, like a notepad or blank document for later use.
- Next navigate to Docubee and into the workflow model that you wish to be connected to Salesforce.
- Once inside the workflow modeler add an Export Document task if one is not already there and select the Salesforce option.
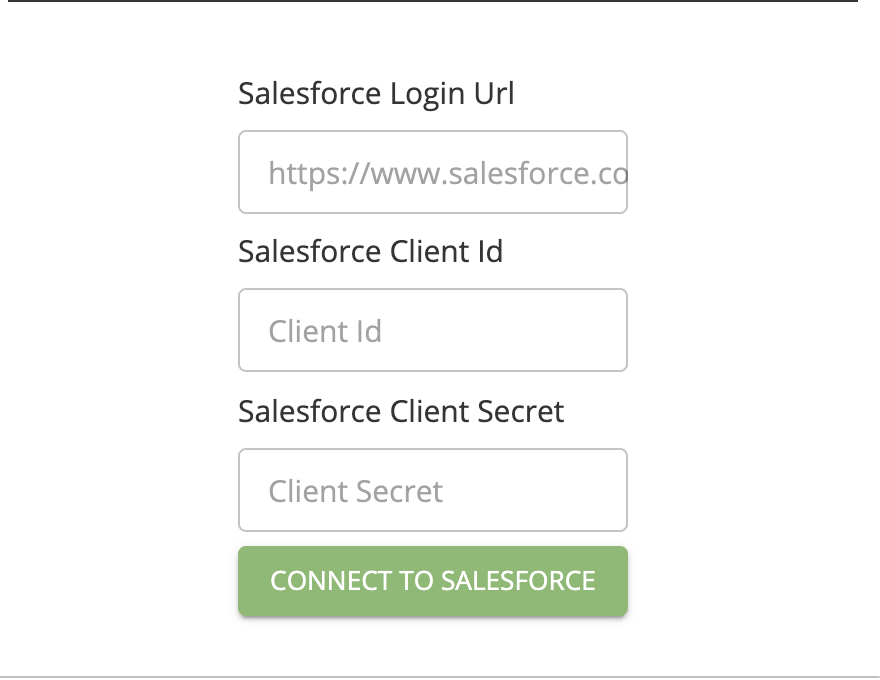
- Once you select Salesforce you will be presented with the following screen:

- Paste in the Consumer Key that you copied earlier into the Salesforce Client Id box.
- Paste in the Consumer Secret that you copied earlier into the Salesforce Client Secret box.
- Your login url is your Salesforce “my url”. For example https://mydomainname.my.salesforce.com/
For more information on this, visit their documentation. - Once all three fields are filled out click Connect to Salesforce and authorize the app.
Note: Because Salesforce limits a user account to 5 connections for a Connected App, we recommend limiting the number of times you use a user account to authenticate Docubee Export Document tasks to 5. If you authenticate with the same Salesforce user account for more than 5 Export Document tasks, it may cause previously configured tasks to fail as Salesforce will revoke authentication for previous connections. See Manage OAuth-Enabled Connected Apps Access to Your Data for more information.
Related Information
All About Workflows (Quick Reference)
Types of Tasks (Workflows)
Salesforce Integration
Use Docubee eSignature for Salesforce AppExchange
Need more help getting set up? Contact us for assistance from our customer support team.


