


View our Pricing & Plans for a detailed list and comparison of features available in each plan.
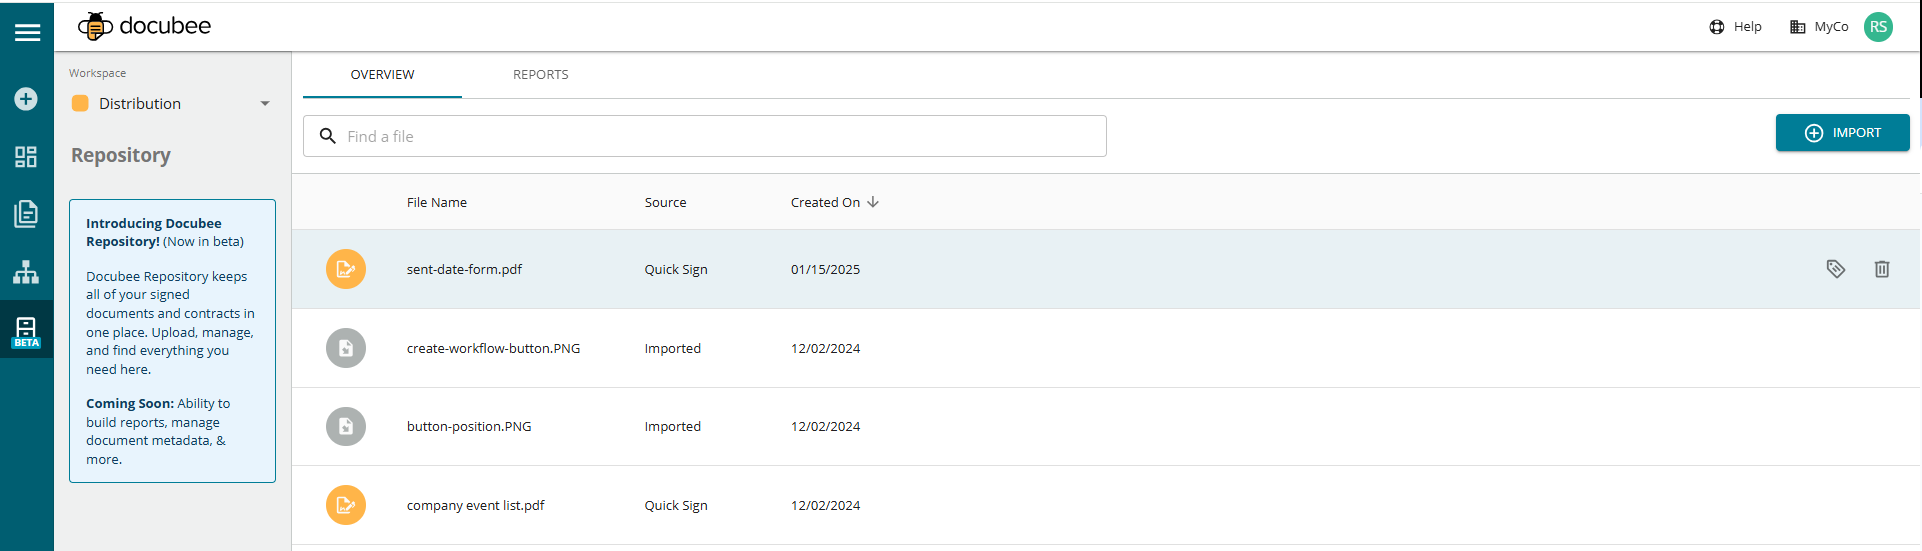
Docubee Repository provides a secure, centralized, and easily accessible storage. Store all your signed documents and contracts in one organized and searchable place. Upload, manage, and find everything you need efficiently.
This unified hub streamlines your document management while allowing for easy access and milestone tracking, resulting in optimized performance while saving time, reduced errors or missed dates.
Access Your Docubee Repository
In Docubee’s left navigation bar, click the Repository icon. The Repository is currently in Beta with more feature updates in the works!
![]()
You won’t have any files in your repository initially, so let’s get you started!
Adding documents to your Repository is easy, and there are several ways to do it.
First select the workspace to which you want to add the document using the workspace selector at the upper-left corner.
Note:
Only workspaces that you have permission to view will be available.
- As Quick Signs and Contract documents are completed, they will automatically appear in your Repository.
Note: Refresh the page to see the completed documents. Documents completed before the addition of the Repository feature will not automatically appear in it. You can download them to your computer and upload them to the repository. - For workflows, you can configure the Export Document task in the workflow builder to send your workflow documents to your Repository.
- For your own documents on your computer/device, import them using the + IMPORT button in the Repository.
Note: Upload documents from your computer/device, Google Drive, or box.
In the Repository:
- Use the Manage Details option to do the following:
- view and download files
- manage tags and metadata.
- Use the Find a file bar at the top to locate a file by entering the search criteria.
- The documents in the repository will get filtered to match your search criteria.
- Click the X at the right end of the search field to clear the search criteria and see the complete list of documents again.
- Use the Delete File option to delete files.
Import Documents to Your Repository
- Click the + Import button at the upper-right corner of your screen to open the Add Files modal.
- Use the following sources to select and add documents to your Repository:
- Drag & drop files or click the Upload Document button to select documents from your computer.
- Click Google Drive and select documents.
- Click box and select documents.
- Click Continue to add the selected documents to your Repository.
- The documents will appear in your Repository.
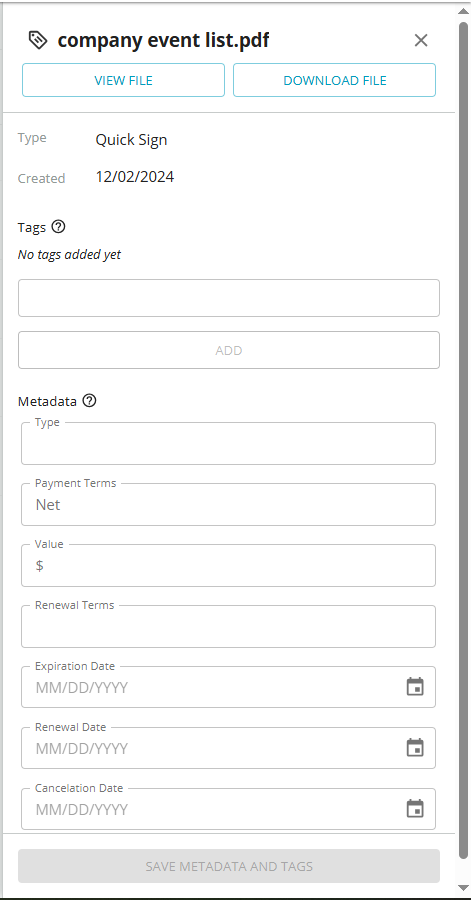
Manage File Details – Metadata & Tags
Manage metadata and tags for files in your Repository. A details side panel offers predefined metadata fields to set values and the ability to add tags.
Metadata fields are predefined fields that allow associating values with their file.
Tags are arbitrary text strings that you can associate with your file to categorize and make them easier to find. You can add up to 100 tags.
To manage file details:
- In the Repository, click on a file or the Manage Details icon
 at the right end of a file to open the details side panel.
View File
To view a file:
- In the Manage Details side panel, click the View File button.
- The file is opened in the viewer.
- Click X at the upper-left corner of the viewer to close it.
Download File
To download a file:
- In the Manage Details side panel, click the Download File button.
- The file is downloaded to your Downloads folder.
Add Tags
To add tags:
- In the Manage Details side panel, enter a tag for the file and click Add.
- Repeat to add additional tags.
- Click Save Metadata and Tags.
Delete Tag
To delete a tag:
- In the Manage Details side panel, click the x next to the tag to delete.
- Click Save Metadata and Tags.
Add Metadata
To add metadata values:
- In the Manage Details side panel, enter the metadata values in the fields to associate with each file.
- Click Save Metadata and Tags.
Search Files
Search for files by entering a file name in the search bar at the top. Search results are filtered and displayed as you type.
Delete File
To delete a file:
- In the Repository, click the Delete File icon at the right end of a file to delete.
Note: The file deletion cannot be undone. - In the Delete File modal, confirm your intent to delete the file by clicking Delete File.
- The file is deleted and removed from your repository.
Related Information
Need more help getting set up? Contact us for assistance from our customer support team or register for Office Hours.

")
