In this guide, we’ll cover the importance of online payment processing and how you can use Docubee’s integrated payments.
Staying ahead of new technology matters, especially if you’re looking to enhance the way clients interact with your brand. Online payment collection is becoming increasingly popular across industries, with benefits both businesses and clients alike reap. If you’re wondering what all the buzz is about, this blog is for you.
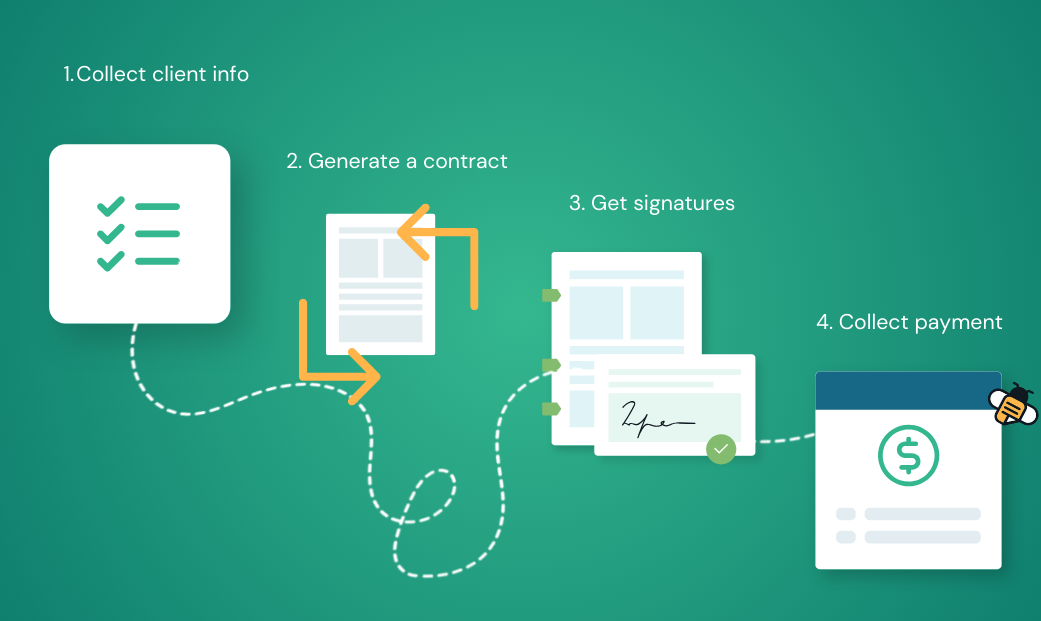
With Docubee, you can collect information from clients, generate a document using that data, have them sign, and then immediately collect payments as part of your workflow. Let’s dive in.
What is Online Payment Processing?
Online payment processing allows businesses to accept digital payments securely through credit cards, bank transfers, or other methods using payment gateways like Stripe, Apple Pay, and PayPal.
These gateways support multiple payment options, giving your clients and customers endless ways to purchase your services.
Benefits of Letting Customers Pay Online
Online payment integrations have become popular in recent years because of their low overhead to implement, but the benefits extend far beyond this for businesses and customers alike.
For business owners:
- Increase sales with convenient payment options
- Save time and reduce paperwork with automated payments
- Faster close rates and transactions
- Enhanced security and compliance
- Easy integration with other tools
For customers:
- Flexible payment options
- Trust that financial information is secure
- Simplified checkout process
Overall, integrating payment gateways provides more convenience and allows for easier long-term growth. These gateways are PCI-compliant to keep customers’ sensitive information safe. Integrating with a secure tool like Docubee gives you added layers of security like encryption and added layers of compliance.

Let’s take a look at how to add a payment gateway to your workflow in Docubee.
How to Collect Online Payments with Docubee
Docubee allows you to easily accept payments online by integrating with trusted external payment providers like Stripe and PayPal. This video provides a quick overview of how to add payment collection to your Docubee workflow function.
Here’s a simple guide to get started:
Step 1: Set Up Your Payment Integration
- Log in to your Docubee account and click the Settings button (gear icon) at the screen’s lower-left corner.
- In the Workspace Management section, select your workspace and navigate to Manage Integrations.

- Under the Payment Providers tab, choose a supported provider like Stripe or PayPal. Enter the required details, including the Connection Name, Publishable Key or Client ID, and Secret Key, which can be found in the account of your chosen payment provider (I.E. Stripe or PayPal).

Once all details are entered, click Create Integration to finalize the setup.
Now that you’ve set up an external payment provider for your workspace, you can incorporate payment collection directly into your workflows.
H2: Step 2: Set Up Your Workflow
- Open the workflow builder and click the (+) button below an existing task. (Note that there must already be at least one user task in the workflow before adding a Collect Payment task).
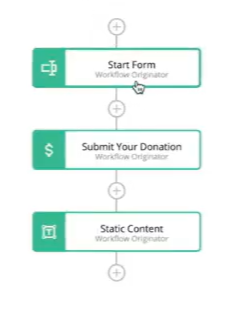
- Next, add a Web Form task to gather the payer’s basic information, such as their name and the payment amount. The amount can be configured as either a currency or number field.
Psssst….You can check out our blog on creating digital forms for more info on using forms in your Docubee workflows.
H2: Step 3: Add a Collect Payment Task to a Workflow
- Once the form is set up, click the (+) button again and, in the right sidebar, select Collect Payment under User Task. This action will add a Collect Payment task to your workflow.
- Click on the task to configure it in the right sidebar.
- You can also modify the text on the “Collect Payment” task to be more descriptive, like “Donation Collection” or “Invoice Payment.”
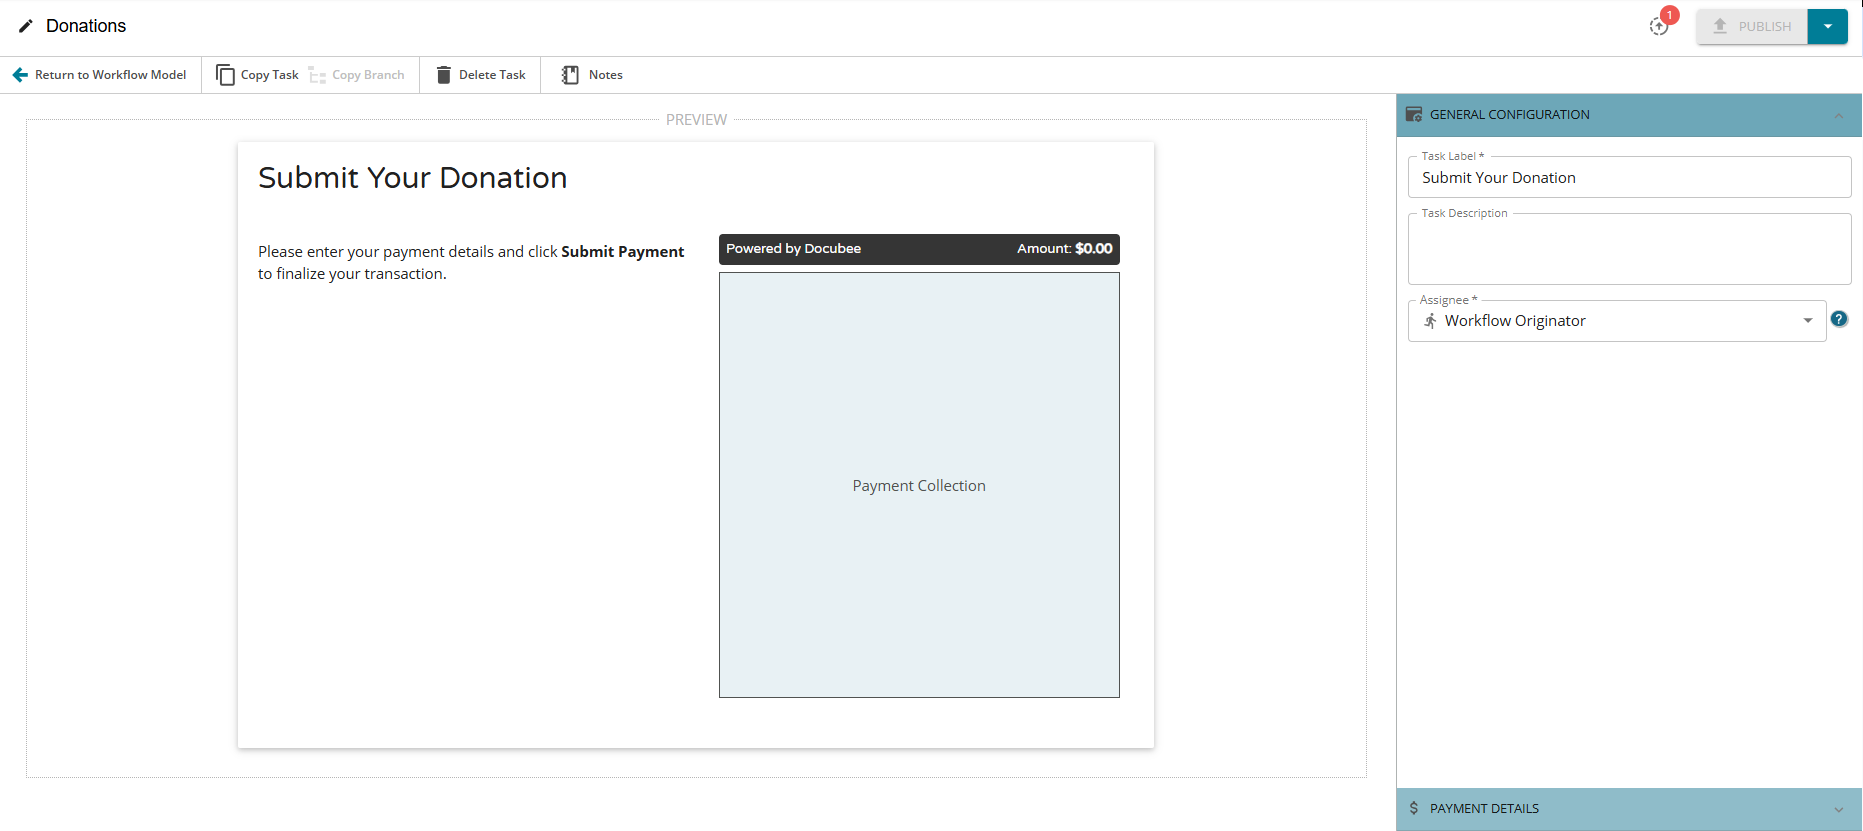
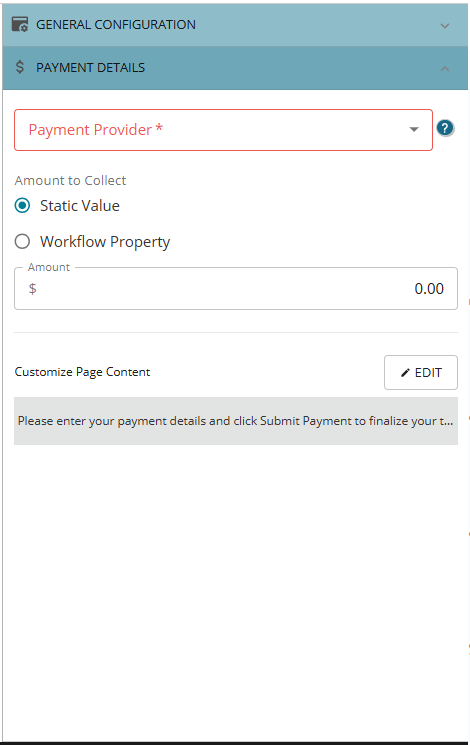
Then, switch to the Payment Details tab to configure the following:
- Payment Provider: Choose a payment provider from the dropdown list you configured in Step 2.
- Amount to Collect: Specify whether the amount is a Static Value (a fixed number) or a Workflow Property (a variable amount based on workflow settings).
- Page Content Customizations: If using Stripe, you can add customized content to your payment page, such as details on how funds will be used or terms and conditions. Click the Edit button add in your changes.
After completing all configurations, click the Return to Workflow Model button at the upper-left corner to return to your workflow.
For more detailed, step-by-step instructions, view the full help center article.
Next Steps for Collecting Payments
Now that you’ve integrated payments into your Docubee workflow, you’re ready to start collecting payments. Find more information on managing payment integrations here.
Not a Docubee customer? Chat with our team to see how payments could work for your brand.


